
If the Windows computers in the office are turned on 24/7, this method could help reduce electricity usage and create less heat, which could further reduce the energy consumed by air conditioning.
Most newer Windows computers are configured to use the ‘Balanced’ power plan by default, and this makes sense because the Central Processing Until (CPU) clocks down when not being heavily utilised and clocked up when more performance is required. However, the ‘Balanced’ power plan does result in slower performing computers, so the ‘High Performance’ power plan is often preferred during working hours. There’s also a ‘Power Saver’ plan which could potentially save more power.
One option to save energy and create less heat is to manually change the power plan just before finishing work, and when starting work, but most people will forget to do this.
A better solution is to schedule these changes to be made using the Windows Task Scheduler or the Managed Service Provider’s (MSPs) preferred Remote Management & Monitoring (RMM) system.
As we don’t know which RMM is being used, we’ll explain how this is done with Windows Task Scheduler.
Each power plan has a globally unique identifier (GUID), and this is used to specify which power plan should be used. In our experience, most computers have the same power plan default GUIDs, but this may not always be the case so it’s worth checking.
Open a command prompt (cmd.exe) or powershell prompt and type “powercfg /L” to list all the available power plans and which plan is currently selected (identified by the * at the end of the line)

A power plan can be selected by using the command “powercfg /S GUID”.
For example, “powercfg /S 8c5e7fda-e8bf-4a96-9a85-a6e23a8c635c” selects the ‘High Performance’ plan, “powercfg /S 381b4222-f694-41f0-9685-ff5bb260df2e” selects the ‘Balanced’ plan, and “powercfg /S a1841308-3541-4fab-bc81-f71556f20b4a” selects the ‘Power Saver’ plan.
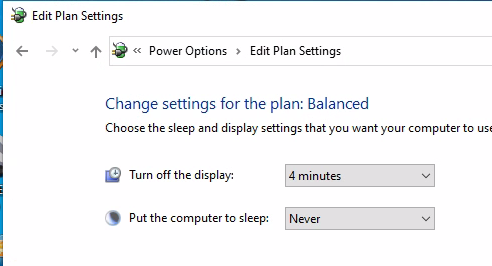
Warning: Make sure ‘Put computer to sleep’ in the relevant the power plan to set to Never.
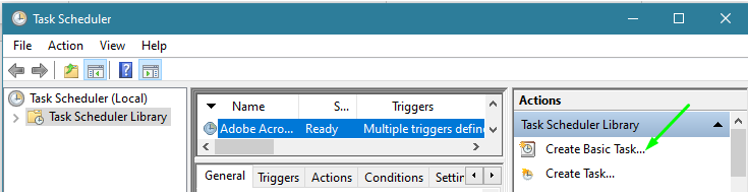
To automatically change the power plans at certain times of the day using the Windows Task Scheduler.

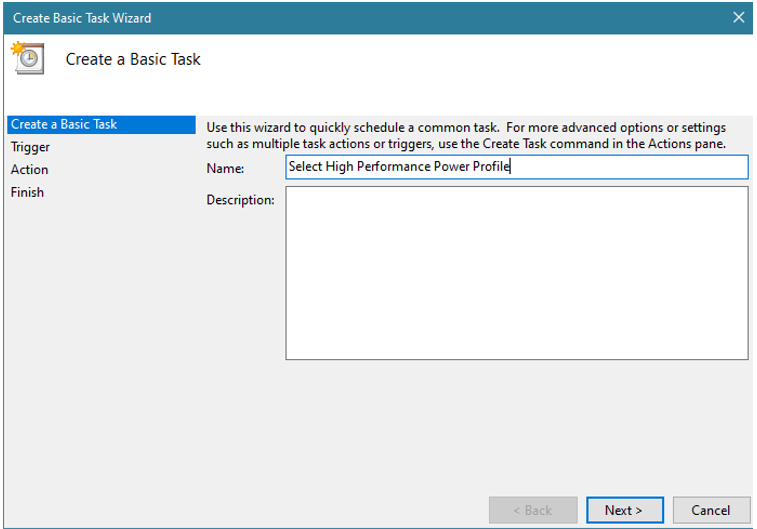
Once opened, select “Create Basic Task” then give the task a name.
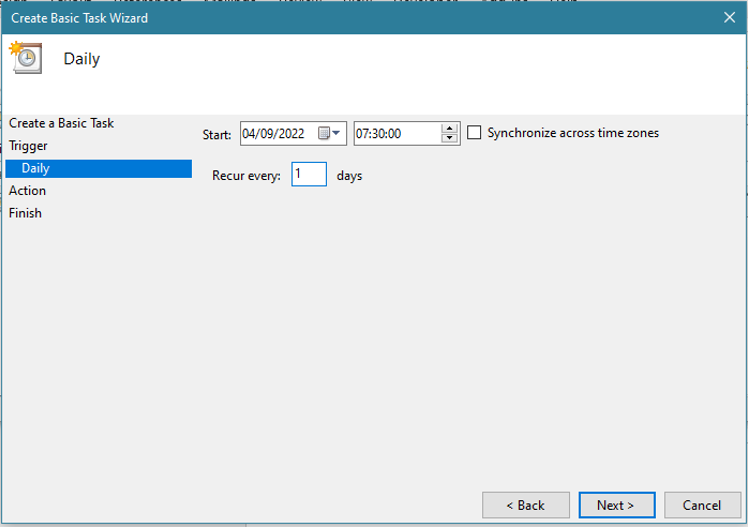
We’ll assume this computer is used every day so are selecting “Daily”.
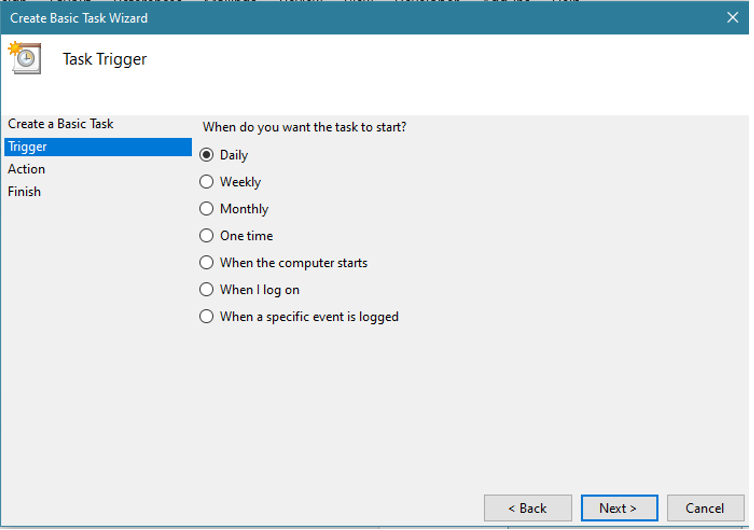
Configure when this task runs. Update the time to just before the computer is to be used each day.
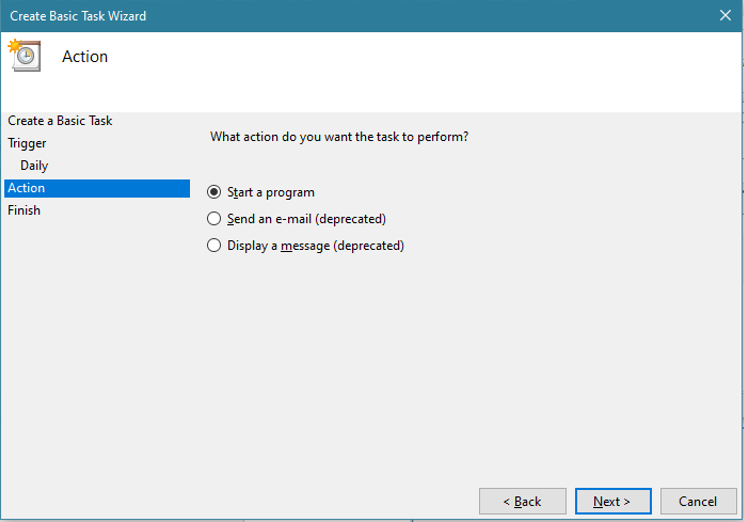
Leave ‘Start a program’ selected.
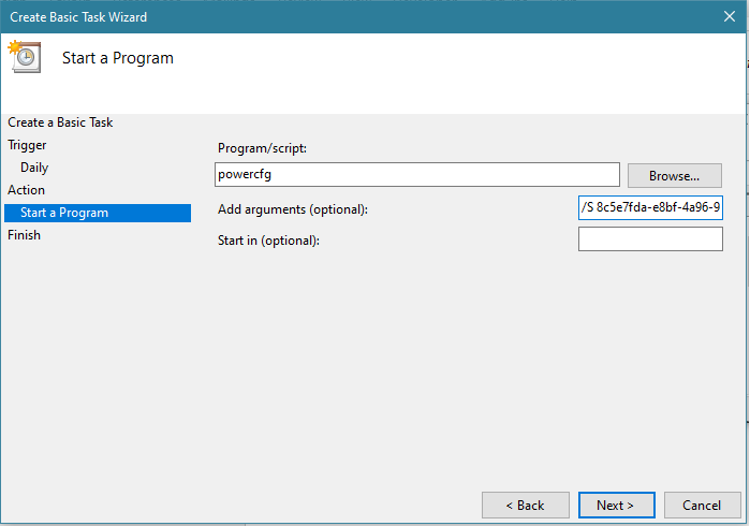
Type “powercfg” in ‘Program/script’ and “/S 8c5e7fda-e8bf-4a96-9a85-a6e23a8c635c” in ‘Add arguments (optional)’
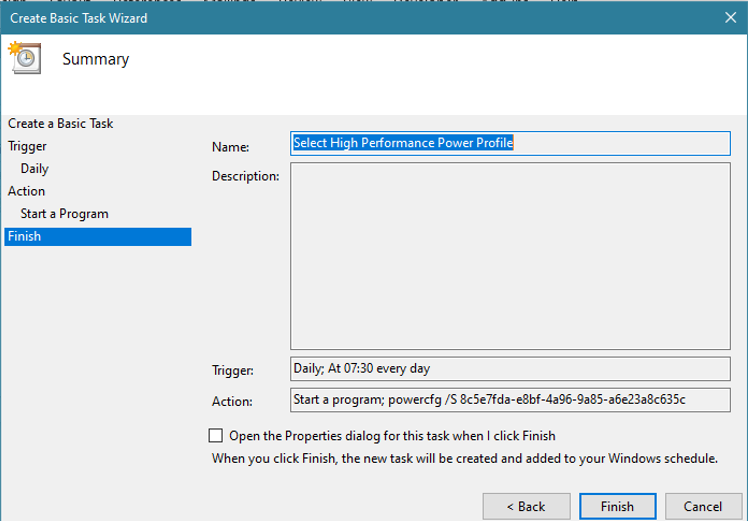
Finish
Now do the same but for the end of the working day and select the ‘Balanced’ or ‘Power Saver’ GUID (“/S 381b4222-f694-41f0-9685-ff5bb260df2e” selects the ‘Balanced’ plan, and “/S a1841308-3541-4fab-bc81-f71556f20b4a select the ‘Power saver’ plan)
That’s it but we’re assuming a user account remains logged in 24/7. If the person using the computer logs out, edit the task properties and change ‘Run only when the user logged in’ to ‘Run whether user is logged in or not’ and specify credentials for the task.
That will be good enough for most office computers, but this can also be useful in another way if somebody is working from home on a gaming computer which by default will be consuming a lot more power.
In this case, creating another power plan could potentially be useful and that plan could be named ‘Working Day’ which is based on the ‘Balanced’ or ‘Power Saving’ plan but tweaked slightly.
To create a new plan in Windows 10, open ‘Control Panel’, ‘Power Options’, ‘Create a power plan’, select ‘Balanced’ or ‘Power Saver’ as the existing plan to start with and provide a new name for the plan.
Once the plan has been created, select ‘Change plan settings’ and tweak as required. More options are available in ‘Change advanced power settings’ including ‘Maximum processor state” which by default is 100% when plugged in.
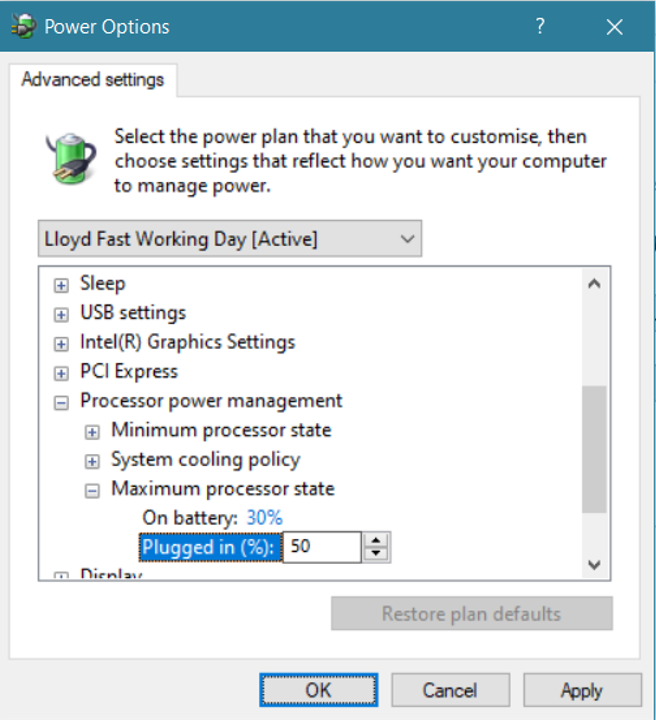
‘Maximum processor state’ could potentially be reduced 50% on higher specification CPUs and the system would still be usable during the working day.
Don’t forget this power plan as a GUID which can be found with the command “powercfg /L” and that will be needed to update or create a new scheduled task.
There are so many possibilities here which can’t all be covered in this article but this hopefully helps get the ball rolling and reduces our total electricity usage.
Finally, if your IT provider uses an RMM, they should be able to schedule these changes on a group of devices at the same time.
If you need any further help with this or anything else relating to your Windows computers, please contact Trichromic LLP using the contact form on our website or call 02033270310 and leave your contact details with a receptionist. ~ Lloyd Reid
Tweaked Featured Image by Bruno