If you’re an MSP or private cloud provider managing 3CX phone systems — or similar nginx-based platforms — there’s a good chance your certificate renewal process has changed in the last year or two. Certificate Authorities have been tightening up their issuance practices, and what used to be a simple “drop the new PEM in and restart” job now usually involves dealing with a full chain back to the root CA. The exact details vary by product, but the underlying patterns are similar wherever nginx is doing the TLS termination.
We recently went through this on a customer’s 3CX system and hit a few of the common pitfalls. Sharing them here in case it saves someone else half an hour of head scratching.
What Changed
In the past, many CAs would issue a single PEM file containing just the server certificate. Modern browsers and clients had the intermediate certificates cached or could fetch them via AIA (Authority Information Access), so an incomplete chain often worked anyway.
These days, when you renew you’ll typically end up with:
- Your private key — generated locally on your server as part of the CSR (Certificate Signing Request) process. The CA never sees this; it only receives the public key embedded in the CSR.
- A server certificate (.pem or .crt) — issued by the CA in response to your CSR.
- A bundle file (.bundle, .ca-bundle, or similar) — supplied by the CA alongside the certificate, containing the intermediate certificates and sometimes the root.
In a typical nginx deployment, the ssl_certificate file should contain the server certificate followed by the intermediate certificate(s) — and that’s what nginx (or anything sitting on top of nginx, like 3CX) wants to see.
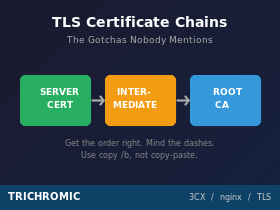
The Right Order Matters
When you concatenate the server certificate with the bundle, the order is critical:
- Server certificate first
- Intermediate certificate(s) next
- Root certificate — usually omitted. Clients already trust the root, so including it just adds bytes to the handshake. Only include it if a specific vendor or product requires it.
Get this wrong and nginx will either refuse to start or will serve a chain that fails validation on stricter clients. The TLS handshake expects the leaf certificate first.
Where It Goes Wrong
This is where the war stories begin. Here are the failure modes we’ve seen:
1. Wrong concatenation order
Easy mistake — you paste the bundle in first because it’s the file you opened first. nginx complains, you scratch your head. Server cert always goes at the top.
2. Missing newline between blocks
If you copy-paste in a text editor and don’t add a line break between the —–END CERTIFICATE—– of one block and the —–BEGIN CERTIFICATE—– of the next, you end up with —–END CERTIFICATE———-BEGIN CERTIFICATE—– running together on one line. nginx treats that as malformed and refuses to load it.
3. Notepad encoding gremlins
Windows Notepad (the basic one) can save files with a Byte Order Mark (BOM), which nginx will refuse to parse. Always use Notepad++, VS Code, or a similar editor that lets you control encoding — UTF-8 without BOM is what you want.
4. The dashes trap
This is the one that caught us out most recently. When copy-pasting cert blocks, it’s surprisingly easy to accidentally drag a dash or two from the —–END CERTIFICATE—– line onto the —–BEGIN CERTIFICATE—– line below it. So instead of:
-----END CERTIFICATE-----

-----BEGIN CERTIFICATE-----

You end up with something like:

-----END CERTIFICATE---

-------BEGIN CERTIFICATE-----
OpenSSL requires exactly five dashes either side of the BEGIN/END markers. Anything else and the parser doesn’t recognise the boundary. Visually, it’s almost impossible to spot in a wall of base64 — you’ll stare at the file and swear it looks correct.
The Clean Way to Build the Chain on Windows
Skip the copy-paste entirely. From a command prompt in the folder containing both files:
copy /b domain_cert.pem + bundle.pem fullchain.pem
The /b flag forces a binary concatenation, which sidesteps every one of the issues above — no BOM injection, no line-ending mangling, no stray dashes, no missing newlines (provided your source files end with a newline, which they should).
Rename fullchain.pem to whatever your platform expects and you’re done.
On Linux it’s even simpler:
cat domain_cert.pem bundle.pem > fullchain.pem
Falling Back to Just the Server Cert (Temporarily)
If you’re under time pressure and the chain file isn’t loading, you can get the system back online with just the server certificate while you sort the chain file out properly. This should be treated as a troubleshooting step, not a long-term fix.
Some clients will still validate fine — modern browsers often have common intermediates cached, and some will fetch the missing intermediate via AIA (Authority Information Access). Others will fail outright: older devices, locked-down corporate networks that block AIA lookups, and certain SIP trunk providers all enforce a complete chain. You won’t necessarily know which clients are affected until users start complaining, so don’t leave it in this state.
Get the chain file built correctly and put it back in place as soon as you can.
Verifying the Chain
Once the certificate is in place, test it from an external machine:
openssl s_client -connect pabx.yourdomain.co.uk:5061 -showcerts
Look for “Verify return code: 0 (ok)” and check that the chain shown includes both your server cert and the intermediate(s). For HTTPS endpoints, SSL Labs (ssllabs.com/ssltest) gives you a comprehensive report including chain completeness.
A Note on 3CX Specifically
On the 3CX v20 system we were working on, using a custom certificate (rather than Let’s Encrypt), the cert and key files lived in:
C:\ProgramData\3CX\Bin\nginx\conf\Instance1\
The exact location can vary depending on installation options and version — some installs put it under Program Files instead — so it’s worth confirming on your specific system before you start. Always copy the existing files into a dated backup folder before replacing them. We use a simple previous 2024-2025 style folder name so there’s an obvious rollback path if the new cert misbehaves. Restart the 3CX nginx service (or the whole 3CX PhoneSystem service) for the change to take effect.
The Takeaway
Certificate renewals are one of those jobs that should take five minutes and occasionally take an hour because of something stupid. The full-chain requirement isn’t going away — if anything, CAs will get stricter — so building good habits now pays off:
- Use copy /b (or cat on Linux) instead of copy-paste in an editor
- Always back up the existing certs to a dated folder before replacing
- Test from an external machine, not just from the server itself
- Use the freshly-issued bundle each time — CAs do rotate intermediate certificates periodically, so don’t be tempted to reuse last year’s bundle file
If you’re an MSP managing dozens of these, it’s also worth scripting the renewal process and standardising on a single approach across all your customers’ systems. The fewer manual steps, the fewer opportunities for stray dashes to ruin your afternoon.